The mandtaory end/begining of year post

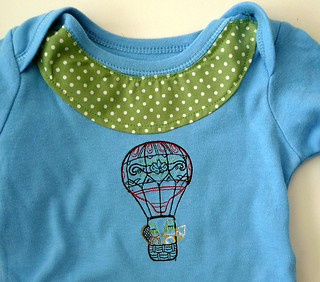
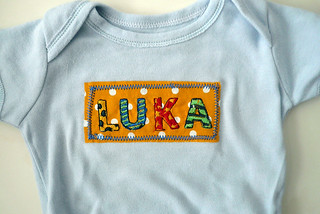
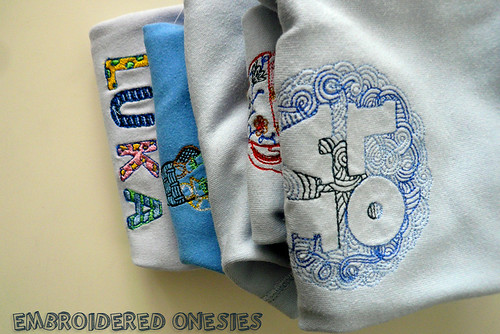
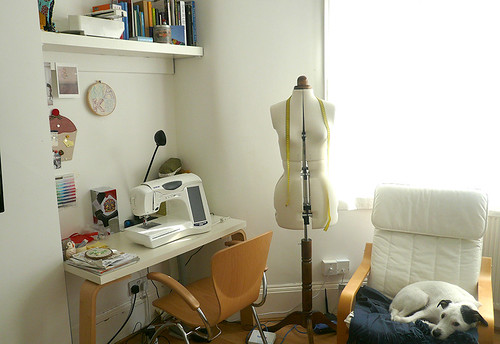
I was quite busy at the end of the year. A pretty huge freelance project seemed like it needed to be wrapped up quickly (although it still isn’t done…), someone started paying me for writing exactly the same stuff I write for my blog, so I kinda prioritised that and then, there was all the Christmas crafting I needed to do. I was really good this year, made some gifts I liked so much it was hard to give them away.

I made a handbag for my sister, a lovely round one with embroiderer cuddling foxes.

I also made a weekender bag for mum, and I printed on the fabric for that one myself. Then there was a kindle sleeve for my dad and some trinkets for others.When I got to Slovenia, I also made a little fox rattle/pillow for my nephew.

I think the weekender bag is my favourite sewing crafting project ever, and the one I’m most proud of. Also the one I spent most (productive ) time on ever. I’m seriously thinking about making the exact same bag for myself. Or maybe the exact same one I made for my sister? Or maybe something new…

Anyway to sum up my 2014 real quick: nothing really obviously big happened, I didn’t get a “real job” or a baby or other similar things my parents would like me to get. I did however do a number of freelance jobs I really enjoyed and was proud of and most of them were surface pattern design related. The one I’m most proud of, is a design for bikinis someone was supposed to make in Australia. I have no idea if that’s actually happening, but I got a picture of a bikini made out of fabric I designed and it was pretty much the highlight of my summer.

swim

Life-wise quite big changes happened, even if not the ones one would expect. People who know me know I had those “I’m going to live super healthy now” trips quite often. They usually lasted a month or two, but then I kind of gave up… My biggest issue was giving up smoking, even when I moved to London where a box of cigarettes costs about a human kidney and a half. I solved that problem by importing way to many cigarettes and forcing all of my friends and relatives to bring me some when they visited. But then, somehow, I honestly don’t even remember how, I started running. And then I didn’t give that up after a fortnight, I actually started to enjoy it. And with that came the realisation that one of the biggest things holding me back, was my nasty habit and I just quit. Just like that. I still have half of a box of cigarettes on my shelf, because this time I didn’t go the “this is the last box” route. It’s there because I hate doing things for the last time – so It’s easier for me not to smoke, knowing I can start again any time I want, so I don’t. (makes more sense in my head then now that I actually put it into words:)). I also almost stopped eating meat (mostly environmental reasons) and I can report that I’m generally quite a bit happier and more optimistic.

And lastly, my goals for this year (not resolutions, I had none last year and I’m now actually healthy and thinner and way happier):

– I want to sew some jeans
– design a fabric pattern collection each month
-possibly sew some hot hot underwear
– carry on running, maybe do a 10k or something like that
– talk to my family more
– write poetry again
– read more books, watch less TV
-blog more. Like at least once a week 🙂
-possibly start an actual business

And that’s that for the obligatory end of the year and first new years post, that merged into one. I have so many projects and recipes lined up, I really hope I actually blog about them:)

Vintage flowery autumn shirt

I originally bought this fabric to make myself a nice pair of summer harem trousers, but before doing that I made other things and other projects seemed more fun and suddenly, summer was over. And, also suddenly, I realized I desperately need long sleeved shirts. Some time ago, I would go to the high-street and just buy some really cheap jersey things, but I’m trying really hard not to buy anything that was almost certainly made in not the most fair conditions. I’m not getting political, I have no idea where the fabric actually came from (and thus can’t climb on a high horse) and I don’t have the skills or money to completely stop shopping on the high street.

So I looked though my stash of fabric and found this flowery thing of perfect weight (it some sort of very light knit). I really love the fabric and am so happy it didn’t turn it into trousers, because in a blouse, it’s so 90sy/60sy vintagey fun. I found the pattern for the shirt in my stash of Burdas, in the February 2013 issue (I think it’s model 135).

I’m wearing the shirt with a knitted collar I once got in a swap and really adore. I wanted to break the whole floweriness of the main fabric with some solid black and thus made the cuffs and then wanted to add a collar, but decided I’m just going make some removal ones, because I couldn’t decide on a shape and wanted to keep my options open. (I still have to make some, but luckily I already own this one:))

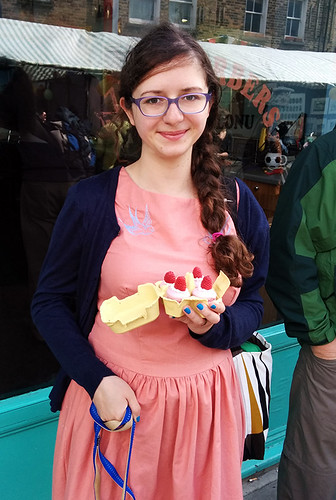
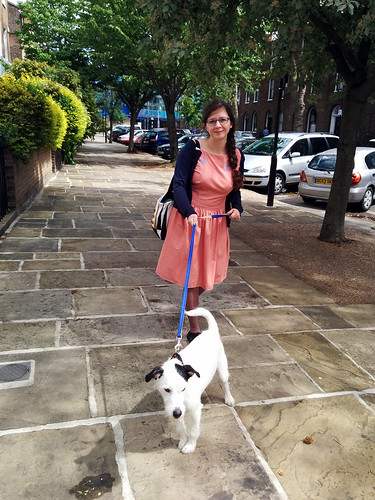
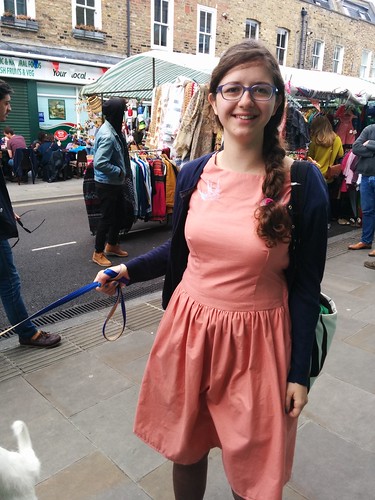
I love how the shirt turned out and I really wanted a nice autumnal and thematic photo shoot. So we went to the Columbia road flower market and took some pictures along the way. London is so f*in beautiful in autumn and the flower market is such a cool place to visit, especially around 4PM, when everyone is selling 2 bunches of flowers for a fiver and I can actually afford lovely flowers:) This time, I even got some cabbage:)

Upcycling Shoes with Machine Embroidery

I got the idea for this revamp on a lonely night bus ride home. After one of the worst journeys ever, in which I got lost without the internet somewhere in the middle of the lonely City at around 2 am, I was almost home when a million of very loud slightly drunk probably very posh 20somethings entered the bus. The only good thing about them was a wonderful pair of shoes the loudest of them wore. Suede flats with an embroidered tiger right in the front. I had one of the “my god, why haven’t I thought of sticking some embroidery on shoes before” moments, but when I found them online, I realized it was because I’m not a designer for a world renown fashion label. They’re Kenzo. Obviously. (I, also obviously, know nothing about fashion these days)

I knew I had to try something similar out on these shoes I once bought for 5 pounds and never wore. I could literally loose nothing. I’m not a fan of tigers, or any Asian inspired embroidery for that matter, it reminds me too much of Chinese restaurants. So I choose a bird. I like embroidering birds on clothes. You might recognize the style of this one form my shorts, and that’s because the design is from the same Urban Threads line (I bought the whole pack:)).

On the of chance of this really working out, I took pictures along to way, to make kind of a tutorial. So here it is:

You’ll need

– a nice, solid embroidery design
-a pair of boring ballerina flats
-some fabric in the same colour as the shoes or a complementing colourful
-embroidery thread
-heavy weight cut away stabilizer
-strong glue
-clothes pins or hair clips
-all the usual equipment (you know, embroidery machine, scissor,…)
-pliers, possibly

1. Get a design. If you wanted to make them more similar to the Kenzo originals, you can easily find a tiger embroidery designs on line. In general, you have to find something that has pretty solid outlines, but the rest is up to you. Measure the width of the front of your shoes, and subtract approximately 2 cm from it. Get a design with that approximate width, or resize the design to it. Remove any existing decorations from the shoes.

2. Stitch the deign out on a fabric of your choice twice- once the original way, and once mirrored. (If you have a symmetrical design, mirroring won’t do much:)) I chose to use fabric of the same colour as the shoes, but I think you could get great results with a different, complementary colour. Use heavy weight cut away stabiliser. Iron on, If you have a choice. (I didn’t, I had the stabiliser at home:))

3. Cut the fabric on the bottom of the design around the design as close to it as possible. (You can shape the top later, so that it looks good on your feet). Put one of the shoes on and experiment with the positioning of the embroidery until you find a place where it looks good. (you could obviously plan the whole thing out beforehand, but I’m not that kind of person).

Don’t just randomly place the design on the shoe so that it looks good. If you look at my shoes without them being on my feet, it seems the design would work better if it was placed a bit lower, and a bit more angled, but then it would look weird on the foot.

Secure it to the shoe with scotch tape, take the shoe off. When you take it off, stick a pin into it, just to be safe it stay where it should. Mirror the position of the design on the other shoe.

4. With a strong glue, glue the design to the shoe. (It doesn’t have to be SUPER strong, you’re also going to stitch it later). Place some clothespins (or hair-clips) on it to hold it down and let it dry for a few hours.


5. With a thread the same colour as the fabric, stitch the design to the shoe. Use small stitches on the right side and place them as close together as you can, but in a places where they won’t be noticeable from afar. Use pliers for help, if you find it hard to get the needle through the fabrics.

6. Enjoy your new designer shoes! 🙂


Things I might do differently next time: add a second layer of fabric under the design before glueing it to the shoes. Possibly planing everything out more and choosing a shoes that fits on the shoes a bit more.

also, here’s a shitty picture of me wearing them. They survived a night out, so I guess the whole thing is pretty sturdy and was definitely worth my time. (ps, I’m wearing a new shirt I’ll have to blog about sometime. and new hair. )

Hot air balloon dress (and some sea)

IMG_20140813_142654

I’ve been crazy busy for the past month, working and working and working in the hopes I’ll be able to completely enjoy my seaside vacation. But I didn’t finish everything I meant to (had to work during the holiday a bit, but at least I had an office with the perfect view once in my life). The main reason for not finishing the work project is … I also wanted to finish at least on last summer sewing project before I left London for Croatia. I knew it will basically be autumn once I got back and I also wanted to have a photo-shoot with one of my makes in a very picturesque setting. Id say the sacrifice was worth it… Here is my hot air balloon dress on me on the gorgeous island Vis.

1
The dress is the Burda style Island Placket Dress (04/2014 #121).

I also planed on making an actual maxi version with a colourful fabric, but decided I prefer swimming to working in lovely dresses on holidays.

closeup

The fabric is some kind of chiffon and it’s the first fabric I bought after moving to London. As probably everyone in the world ever, I’m terrified of sewing chiffon, but in the end it wasn’t as horrible as I expected it to be. I have to redo the hem, I rushed it too much and I need a rolled hem foot (for some reason, I thought I have one, but I don’t.) I have a mild obsession with hot air balloons. But just with the way they look, I’d probably die of fear if I ever had to fly in one.

2
*why do I look like I only have one leg and am generally not very coordianted? Because I’m not. And I’m sooooo awkward at posing:)

I really love the pattern and I’m so sorry I didn’t buy the issue of Burda, because I’d love to make all of the other variations, but don’t have the instructions. I really like the front of the dress, but didn’t realise how bra unfriendly it’s going to be from the side. I might try something out next time I’m making it, becouse there’s difinitely going to be a next time, but not before next spring. It’s time for autumnal sewing now, but I don’t really have anything lined up?

Any projects for autumn you can’t wait to sew?

The Shorts (dealing with my body image issues)

head

These aren’t average shorts. And I don’t want to point out that they were sewn by me or that I added awesome UT embroidery to them (that’s important too, but we’ll get to that later.) These are the first pair of short I have owned in 15 years (cycling shorts don’t count). And 15 years is more than a half of my life. I haven’t worn shorts since I was officially a child.

I always had issues with the way my body looks. My stomach was always too soft and too big. My hair is curly and I have no idea how to control it. The tops of my arms have developed wings of fat in the last 5 years. One of my boobs is significantly bigger than the other. There’s all the other hair all over my body that shouldn’t be there. But nothing has ever bothered me as much as my thighs and the whole cellulite thing surrounding them has.

All of this is about to change, however. For some time now, I’ve been actively working on not hating myself. Not on loving myself, love is a strong emotion, love is hard. I’m just trying not to stare at other women on the street and guess how much worse I’d look in the cute clothes they’re wearing. (I’m also trying not too look at other women, finding flaws in the way they look and feeling smug because I’m “smart” enough not to wear crop tops).

I still remember the day I read my first magazine for “female readers”. It was targeted towards very young teens, full of articles about first kisses and crushes and boy bands. But also, for whatever fucked up reason, full of articles about how to get rid of cellulite and how to hide it if you’re a lazy idiot who’s not trying hard enough to get rid of it. I was 12. I started secretly shaving and stopped wearing anything that my new bible deemed not appropriate for my body type. Then highschool and serious puberty started and I was suddenly to cool and alternative to read magazines like that. I also started wearing all kins of wired (showy) clothes, pretending I don’t care what other people think while in reality I was always careful that, even though the skirts were short, they were wide and long enough to cover the disgusting tops of my legs. I never even tried on shorts. Shorts were too dangerous.

From there, everything went down. I gained and gained weight although I was constantly dieting, trying to get back to the magical “bellow xy where I would be happy”. Then I started my first real job and in the span of a year gained more than 10 kg (20? pounds). After I quit that job almost 3 years ago I did manage to loose some of it, but my wii fit is still telling me every day that my BMI is just on the verge of too high.

I’m pretty healthy, despite the stats. I started running (and I think I’m sticking to it) and do yoga and even on a lazy day walk at least an hour, because the dog would go crazy if we wouldn’t exercise a bit. I’m probably rounder then the average beautiful hipster lady walking around the neighbourhood. But I also have some sewing skills and an amazing embroidery machine and the weather is hot. So fuck it. I’m going to wear some goddamn shorts. I’m displaying all of the dimples on my thighs and I will do my best not to care who sees them. And sometime in the future, when I’m completely OK with how I look, I’ll start with the learning to love myself thing. Baby steps.

2

The shorts are Burda Style 2/2013, model 129. I cut out size 44, because of all of the things I said above, but I could have probably gotten away with a 42. I had to take them in quite a bit in the waist (yay, compared to the rest of my body, my waist is perfect). I also lengthened them a bit, because I didn’t want short shorts. Just shorts are enough for now.

1

I wanted my first grown-up shorts to be special, so I embellished them with one of the new amazing Folklorico designs from Urban threads. I thought about maybe changing the shape of the pockets so they would actually follow the curve of the design, but decided against it, because the pockets aren’t that obvious anyway.

3

As usual, I had problems with inserting the invisible zip (that isn’t invisible now), broke a needle and was very happy I’m wearing glasses, because there was some potential for loosing an eye. But the zipper closes, the hem is actually very straight and I’m really happy with how they turned out. So if people stare at me in anyway, they’re not judging my cellulite, they’re jealous of the awesomeness of my shorts.

Moth bag

P1040859

When I bought my first sewing machine (Lidl, 70 €, still works perfectly) about 5 years ago, I bought it because I wanted to sew bags. Looking back, I have no idea how I got the idea. At the time I wasn’t reading blogs, didn’t follow any crafty forums or had a particularly big interest in crafting (I did dabble in jewellery making and cutting up and drawing weird stuff on T-shirts in high school. I also knit for a short while but never got past the basics. But that was all different.) I guess I must have caught the raising popularity of sewing with the corners of my eyes.

I’m still a crappy seamstress, especially for someone with 5 years of experienced and that’s mainly due to the fact that I’m not patient and like shortcuts. But I was even worse at the beginning. My lack of skill, however, didn’t stop me from sewing an abundance of bags, so the last time I made a new one was 3 and a half years ago.

I couldn’t really justify sewing new ones for quite some time, because I didn’t really need them. Luckily I didn’t move all of my experiments to London and the bag I was using most of the time here (the one form 3.5 years ago) was slowly showing signs of wear. I proclaimed it dead after a liter of baklava syrup got spilled all over it a few weeks ago and I finally allowed myself to make a bag again.

P1040857

My sewing skills did improve a bit, but I’m still lazy and impatient, so I decided to just go ahead without a patter, making everything up along the way. I have the great “Bag making bible” book form Lisa Lam with patterns that would have been perfect, but no… Just cut the fabric, no drawing, think later, sew now.  Now!

I do really like my new bag. It’s pretty and violet and has a moth in the front. But it does show that I haven’t made a bag in while and that I just winged it. Even Norb noticed and commented on the shape of it, although I think he thought I might have made it that way on purpose? Yes, it’s extremely narrow and deep, because I like digging in bags for a long time. Makes me feel like I’m Hermione Granger and I placed an undetectable extension charm on it. (Only, it’s kind of detectable from the outside.)

I didn’t add any closures to it, because I don’t have any in my stash and I also never use them. Since the bag has a flap, gravity keeps it closed anyway. There’s a pocket with an invisible zipper in front, because I got one extra when I ordered a bunch on ebay (and I also didn’t have any other zipps in my stash.) There’s just one special pocket for my phone on the inside, because I’ve learnt from experience that I never use extra pockets in the lining anyway, so if I put them in bags I make for myself, it’s just wasting time and materials. I probably won’t even use the zipped one in front, it’s there just in case I take the bag abroad and I need a somewhat secure place for my passport. I guess.

P1040860

P1040862

The shoulder strap is also pretty wide, but let’s say that was on purpose, because I hate it when bags cut into my shoulder. It doesn’t look proportional to the bag, but what can you do? (you can plan ahead, yes, but psssst.)

The last thing I want to mention is the fabric. Almost all of it (except half of the lining, which came from the remnants of the swallow dress and the inside of the strap) is from a craftster swap (the “Printing fabric by hand” swap, which got me back into printing by hand. I can’t wait to actually finish some projects!.  The fabric is all hand printed and extremely pretty. I got it from this lovely lady.


Sunday Market Swallow Dress

IMG_20140510_130249
This dress was materializing in my mind for years. I love 50ish dresses, I love pastels and I love tattoos. Ever since I’ve realised the potential of my embroidery machine, I knew I wanted to make a top or something in the line, that would have two swallows positioned on each side of the top of my chest, kind of where a lot of girls have tattoos of birds. I really like how they look, but I don’t like the commitment that comes with getting a tattoo in such an obvious place.

I bought the swallow design from Urban threads in one of their sales, just because it’s so pretty. At the time I didn’t connect the design with my dream dress, after all it wasn’t obvious that I could separate the birds and put each one on one side of something. Than one day I decided I’ll sew the Elizabeth dress from the Burda Style Sewing Vintage Modern book as a kind of muslin, from cheap fabric, to see how well the size I think I am fits me, before I try any of the other patterns in the book that are based on the Elizabeth dress. (The concept of the book, If you don’t know it, is that you have a few basic patterns and then it shows you how to make a wide variety of other clothes based on those patterns). Than I found this pretty pink fabric and knew I wanted to actually wear the dress that would grow out of it, but I also knew I had to embellish it somehow. So I searched through my library and there it was… Eureka! 🙂

P1040770

I just separated the two swallows into two different designs with PE design (the software came with the machine, that I bought second hand. I’ve had it for 4 years now and still don’t know how to use it properly) and changed the size a bit (one of the birds is a bit small now, but I don’t mind that). The positioning is not exact either, but I’m OK with that, too (as you can see, I’m far from a perfectionist;)).

The one thing I wanted to try out to make the pattern a bit more interesting, was to “spice up” the back a little. I really like cut-outs and I think trying a simple one on the back is a good start. My trusted Elsa (my tailor’s dummy) was a HUGE help, I couldn’t have done it without her. It’s was so easy with it though, I just pined the pattern to the back and could mark the desired position and shape of the cut-out exactly. I think the cut out is the most successful part of my experiment.

P1040769

I also sewed my first lapped zipper into this dress – mainly because I’m too impatient and lazy. The local fabric store where I bought the fabric didn’t have either invisible or matching zippers, so I bought a contrast one. I had to hide it a bit and a lapped zipper seemed like a good idea. I think it was. 🙂 It turned out better than I expected it to, but again, far from perfect. 🙂 (I learned the basics of how to do it with help of the free class on zipper insertion techniques on Craftsy)

zips

The sewing of the dress was a good exercise in positioning embroidery, cut-outs and trying out new zipper techniques. It also helped me to see that the fit needs a bit of improvement, but I’ll work on that on the next one.

IMG_20140510_133604

I’m definitely going to wear it, I think it would be a shame not to. It seems like a dress one would wear to go strawberry hunting to the Sunday markets, doesn’t it? Hence, the name… 🙂

IMG_20140510_125853

Ps: I do realise my one sided braid was not really the perfect hairdo to showcase this dress. But as you can see, I don’t particularly enjoy modeling, so I decided these pictures are good enough;)


Machine embroidered onesies for beginners

1

The first thing you need to do before you start embroidering on tiny onesies is to find a tutorial written by someone who’s embroidered more than 5 onesies in their life and read that. But you should totally read this blog post, too. Why? You know how you sometimes forget about all of the problems you had when you started something. I didn’t forget about any problems because I just had them. So this blog post is more like a report on my first experience with onesie embroidery. (Which is also my first experience with soft knit embroidery. I know, smart. ) And then, at the end, there’s 2 ideas how to cover mistakes up.

 1. Gather the supplies.

First you’ll need onesies. Most hight street shops with a kids department carry them (I did not know that, maybe you did). Primark has packs of 3 for 3 pounds. I got those.
Then get some designs. I’d say it’s way better if you get designs with a low density of stitches. I got all of mine form Urban Threads (I get all of my designs there. They are always pretty and work perfectly). I also digitized a design and that didn’t go that well, but this isn’t about my problems with digitizing.

It’s the “Luka” one. The future babie’s future name is going to be Luka. He will live on the third floor, if you grew up in the late 80ies/early 90ies and were wondering. Luka is the most popular Slovenian boy’s name, the parents were not huge Suzanne Vega fans.

Then you definitely need a ballpoint needle. I used a 70, because I bought a set of them and that was the smallest size in there. The internet generally said 75. I forgot to change the needle just when I started and the thread kept ripping and it looked weird. Once I’ve changed it, everything got better.
You’ll also need iron on stabilizer, mid weight. I usually use the non ironon variety (because it’s cheaper and works perfectly fine with all of my other nonstrech projects), but you really need an iron on, so eveyrthing is really stable and doesn’t move around or stretch.
The last thing you’ll need is soft embroidery backing, which will protect the baby skin from irritation from the stitches. You iron that on after the design was stitched out and it’s supposed to stay there for ever. All of this stuff is quite expensive, but you don’t really need much of either the stabilizer or backing so you can buy the smallest possible quantity- and you’ll still have leftovers for other projects (t-shirts, here I come!)

back

2. Hooping 

Hopping a tiny onesie is bitch. For all of the designs I did, the perfect hoop size was the second smallest one (6×5 inch, I think). I’m pretty sure that’s also the perfect size for onesie hooping. The width of it is quite similar to the width of the onesie – so once you try to move everything that’s not hooped out of the way, there’s not much left.

I tried 3 different methods of hooping and all of them are quite ridiculous. You could, if you own a serger and have way to much patience cut the sides, hoop the front, embroider it and than sew the onesie back together. But I don’t. I did however find that the method in the link, from step 5 on wasn’t that horrible. (Yes, I ignored all the previous steps and just ironed a piece of interfacing to the back of the front side of the onesie. I’m OK with not perfectly placed designs. It’s for a baby, he doesn’t care. )

http://mommysapronstrings.blogspot.co.uk/2012/01/photo-tutorial-how-to-hoop-embroider.html

So basicly: turn the onesie inside out, iron on the interfacing, place the onesie on the hoop with the interfaced side down. Put the upper part of the hoop inside, hoop the onesie. Strech the rest of the onesie around the hoop, through the bottom opening.

I used masking tape to tape the sides of the onesie out of the way.

Also, if putting the onesie on a hoop is so hard, how the f* are you supposed to put it on a tiny (possibly screaming) human. I definitely don’t want babies of my own. Being an aunt, especially on an island far away from the actual baby, suits me perfectly. I can make all the cute stuff, I don’t have to change nappies! 

 3. Embroidering 

Have some chopsticks or something similar handy so that you can move fabric out of the way when you’re embroidering and you don’t endanger you fingers. Otherwise, proceed as usual.

4. Making mistakes into features. 

I lost a onesie right at the start. I washed them with some newly bought pink fabric, so the once white onesie is now pink (I do have an idea on how to save it, though). If I wouldn’t have genius ideas on how to cover mistakes, I’d loose two more. But I did manage to save them, by turning the mistakes into interesting features. (I used to work in advertising as a copywriter. Making things sound good was my job.) So the last advice I have for you- have some matching cotton on hand. And bondaweb. Just in case.

This one was the one I tried embroidering on first, hooping it a different way. Because I’m not smart, I also tried it with a design I digitized myself (not the Luka one. Another one I deleted and never want to see again). The result was a red blob of pulling thread right next to the collar. I gave up onesie embroidering for two days. Then I tried it with the UT design and the inside out hooping and it worked perfectly, so I had to save the onesie somehow. Unpicking the stitches on top was a pain and took forever. Then there were all all these holes left and a part of the fabric was stretched out of shape. So I made a lovely collar to cover the whole thing up:)

ovratnik

The next one was the last one I worked on. Confident by my other 4 successes, I left the machine to go make some tea. And as it always happens, I came back to an error message, a nest of thread around the needle and the onesie stuck in the machine. I carefully took it out, but there was no way I could continue with the stitching. A tiny part of fabric was completely stretched out. I decided to just do the same design on a piece of cotton and appliqué it over the top. Voila.

luka

I think this baby is going to have a vast amount of embroidered clothes. Even thought they are quite frustrating to hoop and easily destroyed, they are just SO darn cute! And he’s going to be the only baby in the family for quite some time…

stack

Taking clothes sewing to the next level

I have recently decided to take my (clothes) sewing to the next level. I did that many times before and generally things have been improving, but everything I make is still obviously made by me. And when someone tells me: “You made that, didn’t you”, it doesn’t mean I have an awesome unique and distinct style, it doesn’t even mean that the garnet has a hint of homemadenss, but that there are several visible mistakes. Not mistakes other people who sew would see, but mistakes everyone can see.

th

But I’ll be careful now. I will under stitch, edge stitch, top stitch, face and most importantly press. Every step of the way. I have a few sewing books that explain how to do all of these things, but I learn by seeing, so when Craftsy had a sale I bought the “40 techniques every sewer should know” class  and I’m really happy with it. I have yet to apply any of my new found knowledge on a garment (I need to go fabric shopping. Today. ), but I did sew something that will (hopefully) help me achieve a (more) professional look. A (not so professional looking) tailors ham and roll.

th1

I did think about making a tutorial, but since there are a few million of them out there already, a short list is enough:

And there are plenty more if you google it.

Most of them ask to fill the ham and the roll with saw dust, but it didn’t. Because a) my only previous childhood experience with saw dust has thought me that saw dust gets everywhere and is supper itchy and b) I have no clue where you might get it. I decided to instead go for the second option and stuff them with my fabric scraps (which I have plentiful, because I never throw anything away).

Making them was super easy, I think it took me around half an hour (I didn’t use any of the new dress making techniques I now know:)) and I’m actually really happy with how they turned out. The ham is a bit rectangular and I’m not sure if it will really work, but we shall see. I have enough leftovers left for 3 or 4 hams, so no worries.

sewing space

My whole sewing (well, working, I also do all of my work there) space looks quite professional now, wouldn’t you say? Next to my desk you can see my new best friend, Elsa. Dad got her for me as a Christmas+bday present. We like each other, because we both have bigger  butts bottoms. I have to buy her a padded bra though, her chest is a bit too small. The sleepy dog in the corner is the best part of my “office”, obviously. (Why yes, I did tidy up the whole area for the photo. how did you know it does not look like that all the time?)


My project made it to the “Best of Craftster 2013” list

Craftster Best of 2013 Winner
I’m a Craftster Best of 2013 Winner!

I love Crafster it’s one of the first internet places I visit every morning. I love looking at all the wonderful projects people make, the inspiration there is incredible. I never knew how many techniques for making stuff are out there and I quite often try something I’ve never thought of before because I saw something lovely on the forum. Crafty blogs are awesome, but I tend to only read the ones about sewing and cooking, so being a part of a crafty community like that broadens my horizons.  I’m so honoured to be on the list of best projects of 2013!

wolf wall hangig

I got my lovely new badge for a machine embroidery project. There wasn’t much of a competition in the category, not a lot of people post projects from that area. I’m proud non the less, I really liked my projects. The black jacket I was sewing and embroidering, the one that was the reason for the making of this wall hanging (testing out the urban threads embroidery design)  was never finished, unfortunately. It’s still in pieces in my previous sewing space in Slovenia. I started it 2 weeks before the move and than somehow managed to sew(topstiching and everything) two left sleeves by sewing one on the wrong side.  (Yes, my mind was all over the place at the time:)). I’ll bring it here next time I visit home and I’ll probably make it into a vest. Sleeveless is so 2014, isn’t it:)?

Back to the wall hanging: I stretched it over a cheap canvas, decorated it with studs and finally gave it away in the first and only giveaway on my previous (slovenian) blog. I hope Wolfy likes it where he is:)